How to make a bench cushion and upgrade your seating with comfort and style. This easy step-by-step guide shows you how to create a custom cushion using simple materials like foam, batting, and durable fabric—perfect for any DIY level.
We’ve combined quick video tutorials with detailed instructions to suit all skill levels. Even if you’ve never tackled upholstery before, our approach breaks down each stage into simple, manageable steps. You’ll learn how to measure precisely, secure materials efficiently, and achieve a polished finish.
For convenience, we’ve included affiliate links to high-quality supplies like dense foam and heavy-duty staple guns available on Amazon. Use scrap wood or plywood for the base to keep costs low while maintaining durability. The result? A cozy seating upgrade that reflects your unique style.
Key Takeaways
- Custom cushions enhance comfort and add personality to any bench.
- Basic materials include foam, batting, fabric, and a staple gun.
- Video tutorials simplify complex steps for visual learners.
- Affiliate links provide quick access to recommended tools.
- Suitable for beginners with no prior upholstery experience.
- Scrap wood or plywood creates an affordable, sturdy base.
Introduction
Ever considered adding a unique touch to your home with a DIY bench cushion that’s tailored just for you? Inspired by creative transformations from events like the One Room Challenge Fall 2022, this project merges practicality with personal flair. Seasoned crafters often highlight how custom designs breathe new life into forgotten spaces while offering superior comfort compared to mass-produced options.
Project Overview and Inspiration
The vision here is simple: create seating that feels like an extension of your style. Many DIY enthusiasts start with a desire to match existing decor or repurpose materials gathering dust in their garage. One maker shared, “Choosing bold patterns for my window seat cushion completely transformed our breakfast nook.” This blend of creativity and resourcefulness drives the project’s appeal.
Benefits of a Custom Bench Cushion
Tailored solutions outperform store-bought versions in three key ways. First, they accommodate odd-shaped benches that standard sizes can’t fit. Second, you control material quality—opt for stain-resistant fabric for high-traffic areas or luxe velvet for formal spaces. Third, handmade pieces often last longer due to careful construction techniques.
Our guide simplifies the process into clear steps, whether you prefer sewing precise seams or using adhesive for a no-sew finish. Video tutorials complement written instructions, making each stage accessible. By the end, you’ll have seating that combines comfort with durability—all while staying within budget.
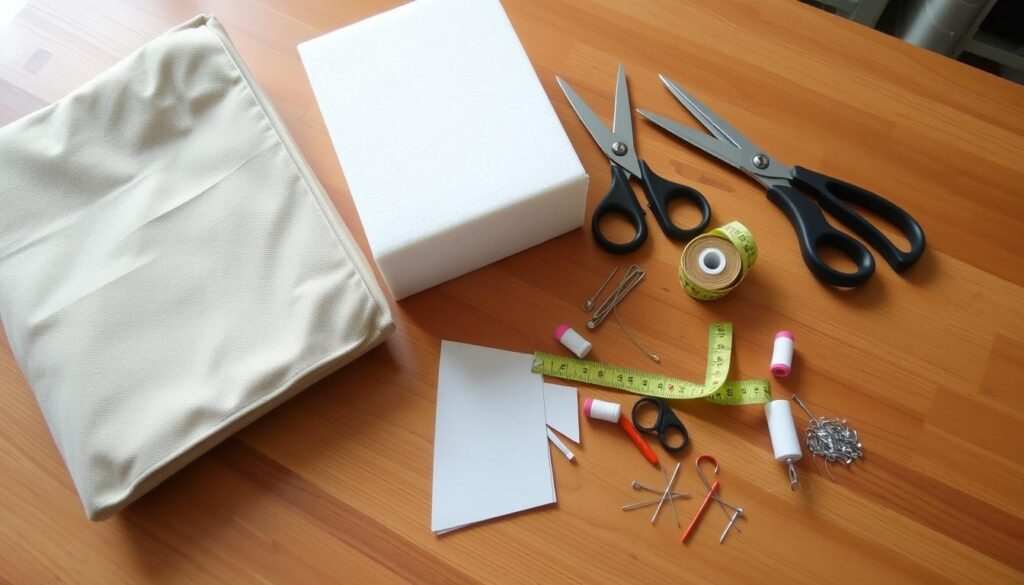
Materials and Tools for Your DIY Bench Cushion
Gathering the right supplies ensures your project stays on track. Start with dense foam (2″–4″ thickness works best) and polyester batting to add softness. High-quality upholstery fabric brings durability and style—choose patterns that hide wear in busy areas.

Essential Supplies from Amazon and Local Stores
For convenience, we’ve curated affiliate links to key items. The dense foam we recommend holds its shape for years. Batting and fabric are available at craft stores like Joann Fabrics, but Amazon offers quick shipping for time-sensitive projects. Scrap wood or plywood makes a sturdy base—check garage leftovers before buying new.
Tools Needed for Cutting and Assembling
A sharp pair of scissors ensures clean edges when you cut fabric. Use a circular saw for foam and wood, or ask hardware stores to pre-cut pieces. A staple gun secures materials tightly, while a measuring tape prevents sizing errors. Beginners appreciate adhesive spray as a temporary hold before stapling.
|
Item |
Purpose |
Where to Find |
|
Dense Foam |
Comfortable seating core |
Amazon (affiliate link) |
|
Upholstery Fabric |
Durable outer layer |
Craft stores or online |
|
Staple Gun |
Secures fabric to base |
Hardware stores |
|
Measuring Tape |
Ensures precise sizing |
Home toolkit |
Keep costs low by repurposing tools you already own. A butter knife works for tucking fabric edges, and heavy books can flatten batting while you work. With these supplies, you’re ready to build seating that’s both functional and eye-catching.
Planning and Measurements
Want your seating upgrade to fit like a glove? Precision starts here. Measure twice, cut once isn’t just a saying—it’s your blueprint for success. Let’s ensure every inch counts.
Measuring Your Bench Accurately
Grab a metal tape—cloth tapes stretch and distort numbers. Record the seat’s length and width, noting any curves or angles. Subtract ¼”–½” from each dimension. This gap prevents a too-tight fit after adding batting and fabric layers.
Determining Foam Thickness and Cushion Size
Thicker foam (4″) suits low benches needing height boosts. Slimmer 2″ options maintain existing proportions. For the wood base, match your adjusted size exactly. Always add 1″ to fabric length on all sides for wrapping.
|
Foam Thickness |
Best For |
Fabric Allowance |
|
2 inches |
Standard seat heights |
+1 inch per side |
|
4 inches |
Low-profile benches |
+1.5 inches per side |
Mark foam and wood with chalk for clear cutting lines. Double-check numbers against your bench’s specs. One DIYer learned the hard way: “Skipping the re-measure cost me three yards of pricey fabric!”
Pro tip: Lay your piece fabric wrong-side up and trace the foam outline with tailor’s chalk. This visual guide prevents uneven edges during assembly.
Step-by-Step Guide: how to make a bench cushion
Ready to dive into the hands-on part of your seating project? Let’s break down the process into clear, manageable actions. These instructions focus on precision and efficiency, ensuring a snug fit and polished finish.
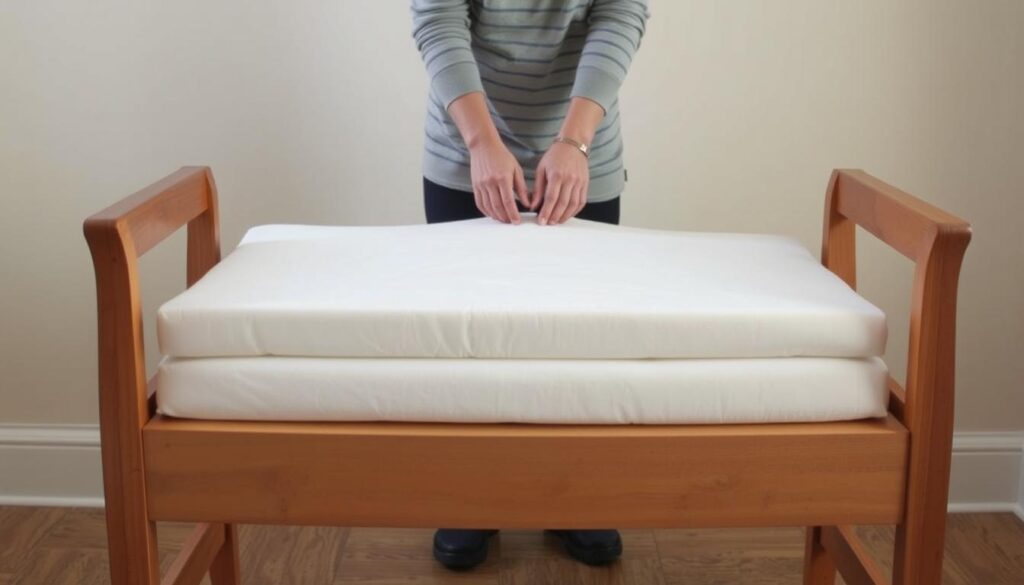
Creating the Wood Platform and Attaching Foam
Start by cutting your wood base to match the bench’s exact dimensions. Use a circular saw for straight edges, or request pre-cut pieces at hardware stores. Sand rough spots to prevent fabric snags.
Apply spray adhesive evenly across the wood’s top surface. Press the foam firmly into place, aligning all edges. Weight it down with books for 10 minutes to strengthen the bond. Trim excess foam with an electric knife if needed.
Wrapping with Batting and Fabric
Lay batting flat and center the foam-covered platform on it. Pull the material taut over the top, then staple underneath every 2–3 inches. Fold corners like wrapping a present for crisp lines.
Repeat with your chosen fabric, starting at the center of each side. Adjust tension as you work outward to eliminate wrinkles. One DIYer notes: “Rotating the piece while stapling helps maintain even pressure.”
|
Tool |
Purpose |
Pro Tip |
|
Staple Gun |
Secures layers |
Test tension on scrap wood first |
|
Spray Adhesive |
Bonds foam |
Use in well-ventilated areas |
|
Fabric Scissors |
Clean cuts |
Sharpen blades regularly |
For curved benches, make small relief cuts in the batting to prevent bunching. Always check the edges from multiple angles before finalizing staples. Mistakes? Gently pry staples loose with a flathead screwdriver.
Sewing and Upholstery Techniques
Mastering fabric techniques elevates your project from basic to bespoke. Whether stitching by hand or machine, these methods ensure crisp lines and lasting durability.
Perfecting Corners and Seams
Start by pinning the fabric right-sides together, leaving a ½” seam allowance. For sharp corners, stop stitching ½” before the edge, pivot the material, then continue. Trim excess bulk diagonally at each corner for smooth turns.
Non-sewers can use heavy-duty fabric glue or iron-on tape. One crafter shares: “Folding edges inward before adhering prevents fraying and mimics stitched seams.”
Zipper Installation Made Simple
Position the zipper along the back edge for discreet access. Attach a zipper foot to your machine for precise stitching. Baste the closure first to test alignment, then sew permanently with a ¼” seam.
Prefer Velcro? Use hook-and-loop strips cut to match your cushion’s width. This allows easy removal without compromising structure.
|
Method |
Best For |
Time Required |
|
Hand-Sewing |
Delicate fabrics |
2–3 hours |
|
Machine Stitching |
Thick materials |
45 minutes |
|
No-Sew Options |
Quick fixes |
20 minutes |
Struggling with puckered seams? Increase thread tension slightly and hold fabric taut while guiding it through the machine. For uneven corners, clip curved areas every 1″ to distribute tension evenly.
Achieving a Plush, Overstuffed Look
Creating seating that feels luxurious starts with strategic layering. Professionals use proven methods to build volume while ensuring cushions retain their shape through daily use. Let’s explore techniques that add both comfort and visual appeal.
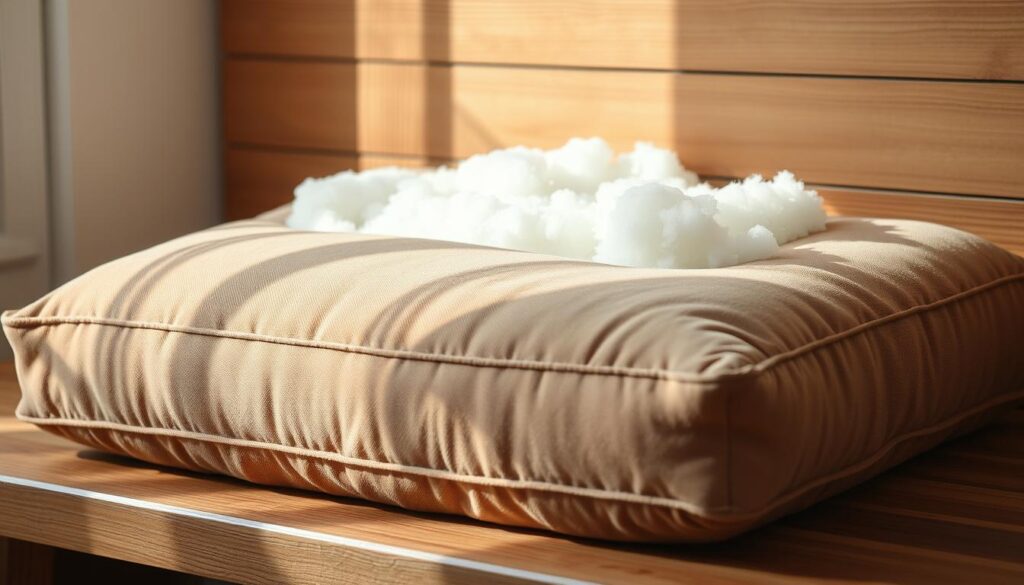
Building Volume with Batting and Dacron
Start by wrapping foam in polyester batting twice—once horizontally, once vertically. This cross-layering technique prevents sagging. Add a Dacron sleeve for extra loft. One upholstery expert notes: “Dacron acts like a girdle, keeping everything tight and smooth around the bottom edges.”
Secure layers with temporary pins before stapling. Pull materials taut but not stretched. Tuck excess fabric under the bottom, working from the center outward. Rotate the cushion frequently to check for even tension.
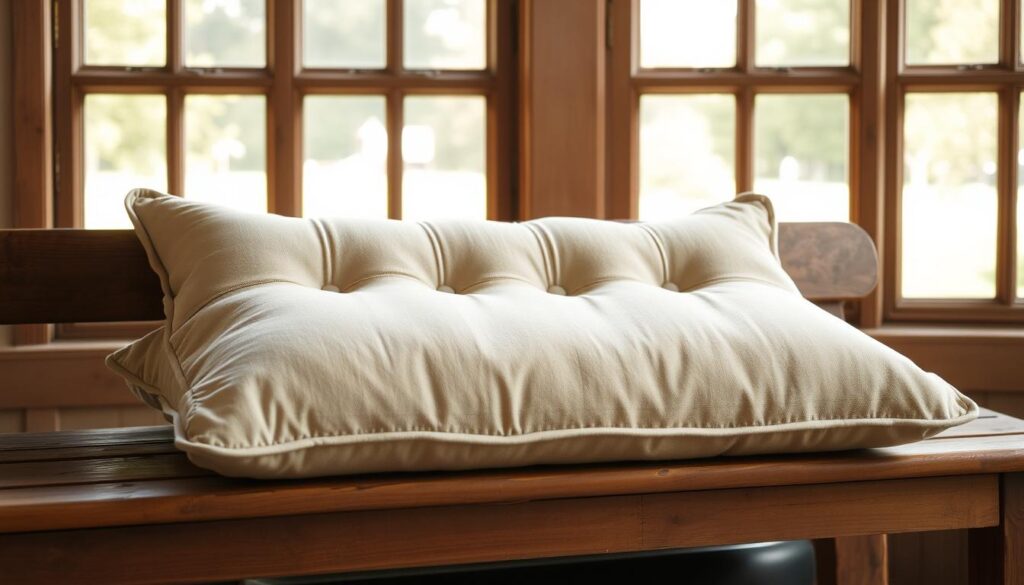
Crafting the Perfect Crown Edge
A rounded crown elevates basic seating to designer status. Use quilted batting along the top edges for subtle elevation. Fold fabric diagonally at corners and staple every inch for crisp definition.
|
Material |
Purpose |
Lifespan |
|
High-Loft Batting |
Adds immediate volume |
5–7 years |
|
Dacron Wrap |
Prevents foam breakdown |
10+ years |
Finish by steaming the surface to relax fibers. This removes wrinkles and helps the cushions maintain their plush profile. Many crafters note these methods withstand pets, kids, and frequent use while staying comfortable.
Additional Tips and Expert Insights
Elevate your project with professional techniques that solve common frustrations. Whether you’re avoiding needles or fixing last-minute hiccups, these strategies deliver polished results.
No-Sew Solutions for Effortless Assembly
Skip the thread with these alternatives. Apply hot glue along fabric edges instead of stitching—press firmly for 10 seconds per side. For curved benches, use double-sided tape as a temporary hold before securing with staples.
One crafter shares: “I folded the material under each side and glued it every 2 inches. The finished edge looks sewn!” Check step-by-step photos to visualize placement before committing.
Fixing Common Construction Issues
Uneven tension often stems from pulling one side too tightly. Start at the center and work outward, adjusting fabric slack as you go. If wrinkles appear, remove staples from that section and smooth the material again.
|
Problem |
Quick Fix |
Tools Needed |
|
Bunched Corners |
Clip excess fabric |
Sharp scissors |
|
Loose Staples |
Re-staple at angles |
Staple gun |
|
Gapping Seams |
Iron-on fusible tape |
Household iron |
Measure the width of your piece after each adjustment. This prevents sizing errors that might affect how it fits in your room. For visual learners, video demos show exactly how to tuck edges and distribute batting evenly.
Conclusion
Creating a custom seat upgrade blends creativity with practical skills. Start with precise measurements, select durable fabric, and layer foam with batting for lasting comfort. Every step—from cutting materials to securing seams—builds toward a polished finish that elevates your space.
Choose bold patterns or textured top fabric to reflect your style. Proper assembly ensures edges stay crisp and corners remain snug for years. Don’t hesitate to get creative—mix materials or add piping for extra flair.
Share photos of your completed project using #DIYBenchStyle. Visit JustMightDIY.com for more ideas like the popular Cozy Reading Nook design. Your handmade cushion isn’t just functional—it’s a statement piece that transforms ordinary seating into something extraordinary.
FAQ
What thickness of foam works best for outdoor benches?
For durability and comfort, 3-inch high-density foam is ideal. Choose outdoor-grade foam if exposed to weather. Pair it with Sunbrella fabric for long-lasting results.
Can I create a removable cover without sewing?
Yes! Use heavy-duty Velcro strips or iron-on hem tape to secure fabric edges. For a polished finish, consider no-sew adhesive sprays like 3M Super 77.
How do I prevent wrinkles when wrapping batting?
Stretch polyester batting taut around the foam before stapling. Trim excess material near corners and use spray adhesive for tricky curves. A second layer smooths minor imperfections.
What’s the secret to crisp cushion corners?
Fold fabric diagonally like gift-wrap when stapling. For sewn covers, clip seam allowances and press with starch. Adding cording or piping elevates the professional look.
Which tools simplify attaching fabric to wood bases?
A pneumatic staple gun (like Arrow PT50) saves time. Use stainless steel staples for outdoor projects. For tricky angles, Roberts 1500 adhesive pairs well with temporary fabric clips.
How much extra fabric do I need for overstuffing?
Add 1-2 inches to each side beyond the foam’s dimensions. For a plush crown, wrap Dacron over batting before securing fabric. Thicker cording (½ inch) helps define edges.
Can I repurpose old cushions for this project?
Absolutely! Recover existing foam by adding fresh batting. Sanitize older foam with a vinegar spray. For sagging cushions, layer new foam over the base using contact cement.
What’s the easiest way to add a zipper closure?
Opt for a separating nylon zipper longer than your cushion. Baste the zipper tape to fabric before final stitching. Brands like YKK offer weather-resistant options for outdoor use.
How do I protect cushions from sliding off benches?
Attach non-slip rug pad material to the bottom using spray adhesive. For built-in benches, add Velcro strips between the cushion and wood base. Outdoor options include silicone grip dots.